Friday, November 29, 2013

Seascape

Today, I'm featuring images from one of the recently released  Sheena Douglass A Little Bit Scenic sets. 
These images are from the Seascapes set.


I stamped the boat image onto craft cardstock and the lighthouse onto Ultra Smooth Premium White Cardstock.  I used a white and black pencils to color the highlights and darken areas on the boat. 


I used distress inks to create a subtle boarder around the boat.


I also used them to soften the lighthouse background. I cut it to size first.


I used some twine from my stash to wrap around the card for a rustic touch. 


Crafter's Companion has had several new releases. For more ideas, be sure to pop over to the Crafter's Companion Information Blog, as well as visit the Crafter's Companion DT members.  You can see their latest designs by clicking on the names on the left side of my blog.

Thank you for visiting!!

Take care and STAY POSITIVE!

Friday, November 22, 2013

New Everyday Sentimentals!

Today, I'm featuring a sentiment from one of the newly released Everyday Sentimentals Sets
The sentiments are so versatile!


I stamped the sentiment onto Ultra Smooth Premium White Cardstock and ran it through my eBosser with a die cut. I left it in the die cut an sponged with Distress ink using a blending tool.


To create the background layer I started with a design I created using my Gelli Plate. You can see how I did it here.  Here's what the base looked like:


Next, I cut a section and used the Distress ink and some rich LUXE  tuxedo black (available soon at Crafter's Companion) with a top from one my spray bottles to add some circle
 design elements.


After I adhered the layers, I added a few more black circles to overlap the sentiment layer. 


Crafter's Companion has had several new releases. For more ideas, be sure to pop over to the Crafter's Companion Information Blog, as well as visit the Crafter's Companion DT members.  You can see their latest designs by clicking on the names on the left side of my blog.

Thank you for visiting!!

Take care and STAY POSITIVE!

Friday, November 15, 2013

Xyron - 30 Days of Holiday Gifts

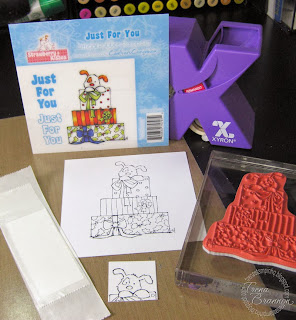
The Crafter's Companion Design Team is in cahoots with The Xyron Facebook Page! We are partnering together to create some cool projects using some fabulous Crafter's Companion Christams Images and some cool Xyron products. So many to choose from... I finally settled on Strawberry Kisses Christmas EZMount™ Stamp Set - Just For You. Something about it makes me smile at the thought of one of my little nieces opening the envelop and seeing this card.


I stamped the main image onto Ultra Smooth Premium White Cardstock. I also stamped the adorable little puppy a second time.   I ran a piece of card stock (1 1/4" x 3") through the 1.5" create-a-sticker maker.  I removed the clear cover,  trimmed the sides, turned it over and ran it through to make both sides sticky.


With the plastic cover on, I rubber the cardstock to make sure the adhesive stuck well to both sides.  Next, I  remove the plastic cover from one side and sprinkled glitter. I rubber my finger over the glitter to burnish it and stamped the bottom present on the glitter.


Time for coloring!! I used the packaging cover as guide and colored all the images with my Spectrum Noir MarkersI colored directly, using a light touch, onto the glitter. I cleaned off the tip by coloring back and forth on scratch paper. For smaller areas, I used one color - laying it down in the darkest area and then pulling the color toward the lightest area with the Blender.TIP: for very small areas dot the color in. The fine point tip on the SNs is great for tiny areas! I colored all the red areas first using DR3, DR5, DR7.


Greens: CG1, CG2, DG3


I finished coloring the presents and cute little puppy with the colors below.  I used  IG1 to create a little shadow in the white areas.


I used the Mega Runner to apply adhesive to the larger areas of the card. It fits nicely in my hand and is so easy to apply!


To pop up the puppy, I used a few of the adhesive dots piled on top of each other to make the puppy really look like he was on top of the present leaning over.


The final touch was to add some sparkle to his nose with Stickles Distress Glitter Glue - Fired Brick


Be sure to pop over to the Crafter's Companion Information Blog, as well as the Xyron Facebook Page,  where you can see creative ideas and uses of the products! Please leave comments everywhere - blog pages and the Xyron Facebook Page. You  may even see some giveaways... :o)

Thank you for visiting!!

Take care and STAY POSITIVE!

Tuesday, November 12, 2013

Glittering Leaves

Today, I'm featuring images from A Little Bit Sketchy EZMount Stamp Set - Autumn Leaves
In the Midwest there are many beautiful colors in the trees and bushes.  I tried to capture a little bit of that beauty here.


 I started by adhering creative tape onto Ultra Smooth Premium White Cardstock. I peeled off the other side and sprinkled white glitter. I stamped the images using an India Ink Black Pad


After they were completely dry, I colored them with my Spectrum Noir Markers. I colored directly, using a light touch, onto the glitter. I cleaned off the tip by coloring back and forth on scratch paper. For smaller areas, I used one color - laying it down in the darkest area and then pulling the color toward the lightest area with the Blender. TIP: for very small areas dot the color in. The fine point tip on the SNs is great for tiny areas!

acorns: EB3, TN6, Blender


larger leaves: CT3, CG3, OR2, TN6
smaller leaf: CG3, TN6


For the background, I used 4.25" X 5.75" Embossing Folder - Forest. I ran it through my eBosser on Ultra Smooth Premium White Cardstock - the perfect background for my colorful leaves! The sentiment is from A Little Bit Sketchy EZMount Stamp Set - Best Friend Swirls.


On the inside I add the single acorn.


Crafter's Companion has had several new releases. For more ideas, be sure to pop over to the Crafter's Companion Information Blog, as well as visit the Crafter's Companion DT members.  You can see their latest designs by clicking on the names on the left side of my blog.

Thank you for visiting!!

Take care and STAY POSITIVE!

Friday, November 8, 2013

Crafter's Companion November Challenge: Christmas/Winter

This month's Crafter's Companion Challenge Blog theme is Christmas/Winter   I'm featuring an image from Strawberry Kisses Christmas EZMount™ Stamp Set - Happy ChristmasThe sentiment is from Dee Gruenig EZMount Stamp Set - Ahhh... Christmas!


 I stamped this adorable little kitty onto Ultra Smooth Premium White Cardstock and colored with my Spectrum Noir Markers. I used a combination of direct coloring to the cardstock and also pallet coloring - scribble color onto an acrylic block and pick up with a lighter color. As you lay the color on the cardstock, a natural blending occurs. NOTE: I used the color along tutorial at the Spectrum Noir Blog  to color.
  
  pot: DR3, DR5, DR7
kitty: IG1, IG2, IG4, OR3, CT3, BP1
flower: CR6, DR3, DR5, DR7
leaves: CG2, CG4, DG3


The background layer is made with 4.25" X 5.75" Embossing Folder - Loose Floral. I added a ground with IG1 and added a little Stickles Glitter Glue - Fruit Punch to the center of the flower. 


Sharing the new color chart I filled in. I printed on a piece of   Ultra Smooth Premium White Cardstock  and colored on half of each little section. I like to see the letters/numbers. :o)


Every month, there's a fun challenge with a chance to win a voucher to shop at Crafter's Companion. Visit the Crafter's Companion Challenge Blog for all the details on this month's challenge. For inspiration, be sure to visit the Crafter's Companion DT members.  You can see their latest designs by clicking on the names on the left side of my blog..

Thank you for visiting!!

Take care and STAY POSITIVE!

Friday, November 1, 2013

Pumpkins!

Pumpkins are on my mind and everywhere I look. The texture in these pumpkins was created with Sheena's Ageing Beautifully.


For my design, I started by spritzing  High Gloss Cardstock with alcohol and then dropped colors  of Spectrum Noir Ink Refills in - CT3, DR3, OR2. I tilted the cardstock around to blend the colors and move them to cover the piece. Next I kissed a clean piece of cardstock to the inky one. Click here to see more about kissing with inks.


I really dig the subtle cool design that is created when pulling apart the two pieces of cardstock! After the ink dried, I stamped images from Sheena's set using  Delicata Rich and Radiant GoldenGlitz ink pad (coming soon to Crafter's Companion!).  


I allowed the ink to dry completely and cut out oval shapes with a die cut.


For the background layers I used the 6" X 6" Embossalicious Embossing Folder - Regal Corner and Ultra Smooth Premium White Cardstock.   I created a portrait and landscape layer.


For a matching background layer, I used the inky cardstock I cut the ovals from. I added a little ink to make sure all the edges had color and stamped around the edges.


I trimmed everything to size, adhered the ovals down. The stems were drawn and colored in with my black Spectrum Noir marker.


On the inside, I stamped portions of the crackle image in gold.


Shout out:  I was inspired by a pumpkin oval punch card my stampin' sister Michelle did. She is the Brayer Queen - I say that with much respect!  I've learned so much from her about brayering. I had the opportunity to take two classes with her!

Crafter's Companion has had several new releases. For more ideas, be sure to pop over to the Crafter's Companion Information Blog, as well as visit the Crafter's Companion DT members.  You can see their latest designs by clicking on the names on the left side of my blog.

Thank you for visiting!!

Take care and STAY POSITIVE!