Showing posts with label Tombow Dual Brush Pens. Show all posts

Thursday, June 12, 2014

Watercolored Mandala

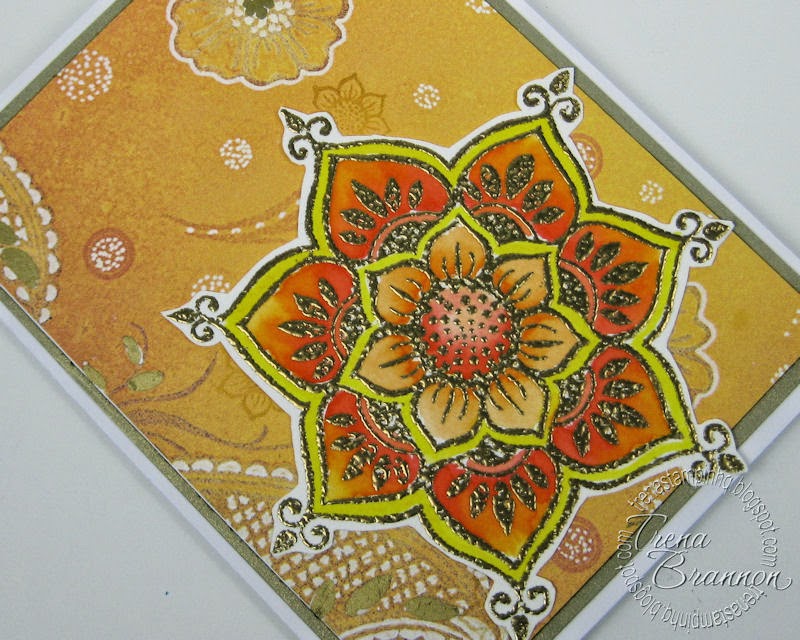
Today, I'm sharing one of my favorite coloring techniques - watercoloring with water-based markers. The images are from Sheena A Taste of India EZMount Stamp Set - Mandala


 I stamped the lovely mandala image onto watercolor paper using a Delicata Golden Glitz ink pad, sprinkled with emboss powder and heat set.   The background is a digital design paper from Sheena A Taste of India - Video Resource CD printed onto Ultra Smooth Premium White Cardstock. To tie in the gold from the main image, I stamped a small image from the set randomly with a Delicata Golden Glitz ink pad.


Next, I colored with Tombow Dual Brush Pens, which are water-based. I used the direct method of applying color and then I spread the color with a water-brush. I started with a clean water-brush, damp not saturated, in the lightest areas and moved to darkest, working in one area at a time.


I edged the design paper layer with a gold leaf pen, colored in leaves and added centers to the flowers.


On the inside, I stamped the sentiment from the set and added a flower cut out from the design paper.


Crafter's Companion has had several new releases. For more ideas, be sure to pop over to the Crafter's Companion Information Blog, as well as visit the Crafter's Companion Education  and InspiratonTeam members.  You can see their latest designs by clicking on the names on the left side of my blog.

Thank you for visiting!!

Take care and STAY POSITIVE!


Friday, January 17, 2014

Koi in Gold


I inked up the images with a Delicata Golden Glitz ink pad, stamped onto watercolor paper, sprinkled emboss powder and heat set. 


Next, I colored with Tombow Dual Brush Pens, using the direct method of applying color and then spreading the color with a water-brush. I started with a clean water-brush, damp not saturated, in the lightest areas and moved to darkest.


For the water and sky, I used a combination of the above technique and also the indirect technique of scribbling color onto a palette, picking up color and spreading.


The background design paper is from A Little Bit Oriental - Papercrafting Collection - Luxury Designer Paper Pad.  I added a sentiment and small lily from the set.


On the inside I used a piece of the colored watercolor paper and stamp the the small lily. 


Crafter's Companion has had several new releases. For more ideas, be sure to pop over to the Crafter's Companion Information Blog, as well as visit the Crafter's Companion DT members.  You can see their latest designs by clicking on the names on the left side of my blog.

Thank you for visiting!!

Take care and STAY POSITIVE!

Friday, December 13, 2013

Wrapping Paper Background

Have you every received a gift in some beautiful wrapping paper and saved the paper? I do that all the time. Sometimes I use it to wrap a gift or use it as a background for a greeting card.  I received this lovely paper from my work sister. It is so pretty, I knew I had to use it!  And the cool thing is, the other side is also very pretty - I'll use that on a project soon and share! The image is from Sheena A Little Bit Oriental EZMount Stamp Set - Sakura. 


I inked up the lovely flowers image with silver metallic ink, stamp onto Ultra Smooth Premium White Cardstock, sprinkled with silver metallic embossing powder and heat set.   Next I colored with water-based markers. I used the tip to tip method, touching the blender to a light pink to add just a touch of color.


Crafter's Companion has had several new releases. For more ideas, be sure to pop over to the Crafter's Companion Information Blog, as well as visit the Crafter's Companion DT members.  You can see their latest designs by clicking on the names on the left side of my blog.

Thank you for visiting!!

Take care and STAY POSITIVE!

Thursday, June 13, 2013

Embossalicious!

Today Crafter's Companion is very excited that Splitcoast Stampers is doing a Product Feature on the Crafter's Companion Embossalicious Embossing Folders!  We're are excited to spread the word on these wonderful little treasures of the crafting world!  The various size folders are great for greeting cards and scrapbook pages. My design shows how to use it on a greeting card. 

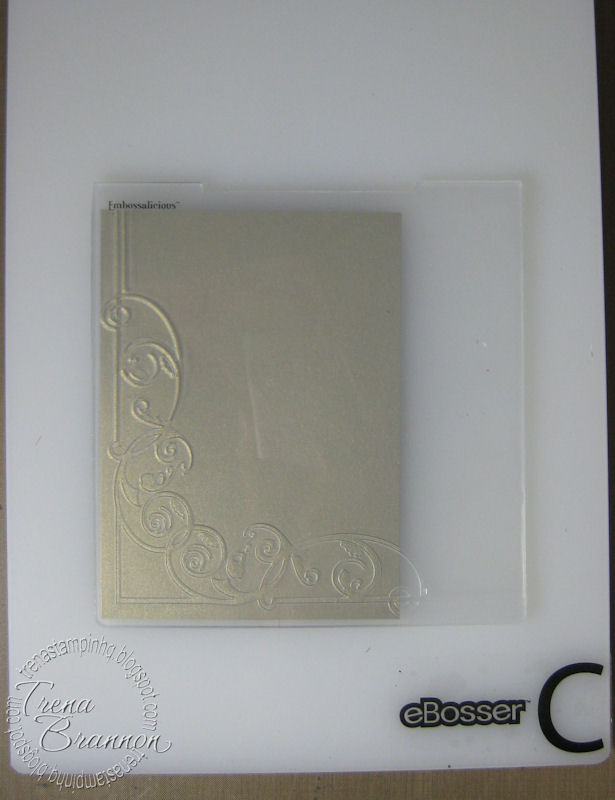
Here's what I created using the 6" X 6" Embossalicious Embossing Folder - Regal Corner folder! 


I'm also featuring Sheena's Floral Fantasy EZMount Stamp Set - Bluebells & Daffodils as the focal point. I'm really digging her latest Floral Fantasy designs!  

I started with the embossed background layer. I cut the cardstock to A2 size, placed it in the corner of the embossing folder, and ran it through my eBosser. 


Next, I stamped the daffodil images from the set onto water color paper, sprinkled emboss powder and heat set.  I colored them with Tombows Dual Brush Pens, using the direct method of applying color and cut them out.


Do you have a favorite Embossalicious embossing folder? Head over to Splitcoast Stampers to find out how to get a discount off your next embossing folder purchase with Crafter's Companion. Submit your favorite card made with the Embossalicious line of folders in the SCS gallery, using the tag CraftersEmbossing.

Tuesday, June 11, 2013

More Graduation Cards and Blog Candy!

I've been designing more graduation cards! We know so many people graduating - from high school and college and we are proud of all of them! 


To see the details of how to make this cute money/gift card holder, click here. 

To help celebrate graduations everywhere, I'm giving a way this adorable Ai This is Huge Set (Sku#4288) for you to make a special cards!!


To get in the random drawing:

1. Please leave me a comment telling me your favorite Ai image/set by June 16th 6pm central
2. Be a follower of my blog
3. Have a USA address

On Monday June 17th, I'll share the winner's name. 

Thanks for visiting!

Take care and STAY POSITIVE!

Friday, June 7, 2013

Pink Ballerina

My design today features images and design papers from the Crafter's Inspiration Spring Edition, which is on sale!


 I started by stamping the adorable ballerina which comes as part of the clear stamp collection in the kit. 
I stamped her onto water color paper and colored her using water based markers and a water brush. I used a combination of direct to paper coloring and in-direct - scribble marker onto palette and pick up color with a water brush.  After coloring, I cut her out.


I added layers to the base card using design papers in the kit and stamped the ballerina onto the top layer - this allowed me to know where her feet will land and I colored a "floor" in with N60 and N00.


The kit is jam packed with great stuff for over 65 projects, including:

CD containing elements from the following ranges:
• Party Paws • Angelica and Friends • Crisalis • Meadow Cottage Bears • Mulberry Wood Everyday • Morehead • Sheena Douglass • Plus exclusive SVG files to use on eCraft

Papers from
• Party Paws • Angelica and Friends • Crisalis • Meadow Cottage Bears • Mulberry Wood Everyday • Moorehead • Sheena Douglass

Stamp set with designs from
• Angelica and Friends • Meadow Cottage Bears • Sheena Douglass

Plus
• Embossalicious embossing folder • Shamballa style faceted bead bracelet kit

Techniques covered inside the magazine include:
• Stamping • Embossing • Beading • Decoupage • Colouring • Die-cutting • Box-making • And much more

Over 65 inspiring projects

Crafter's Companion has had several new releases. For more ideas, be sure to pop over to the Crafter's Companion Information Blog, as well as visit the Crafter's Companion DT members.  You see their latest designs by clicking on the names on the left side of my blog.

Tuesday, June 4, 2013

Wiggle Your Toes in the Sand

My Design today features a different style of graduation card - not your traditional card. 


I know what you're thinking - that doesn't look like a graduation card. When you read the words on Island Window (Sku#M3178), you see that it is - Wiggle your toes in the sands of the Sea, dream of tomorrow and all that can be. I love those words!  A dream is where it all starts - our ambitions, the choices that we make - they are driven by our dreams and that's why I dig this image for a graduation card! To color this image, I chose Tombow Dual Brush pens. They work great on smooth coated card stock.

 I love the bright colors of the image at the Ai website and used it as a color guide.  Using the guide and the color chart I created with the dual brush pens on Cryogen cardstock, I jumped into coloring. I colored direct to paper and also used a palette to achieve a smooth blending of colors. For palette blending, I scribbled a brush pen of darker value down and picked up color with a pen of lighter value.


After coloring the image, I trimmed around the words. 


Those beach chairs needed some shade, so I added a Beach Umbrella Brad. Once I figured out the placement for the umbrella, I used a push pen to make a hole so I could see exactly where I was placing it. I could then see that the umbrella should be behind the flowers in the foreground . I used a craft knife to cut around the flowers.


There's still time to get in on the "Use Brads or Eyelets" Eyelet Outlet Product Swap! challenge at Ai!!


Thanks for visiting!

Take care and STAY POSITIVE!

Tuesday, April 16, 2013

Float On, Float On

This week I'm working on more Girlfriends Cards.This card says vacation!


The focal image is from the Stayin Afloat Set (Sku#4239). I changed up my coloring tools this week - water coloring with Tombows.  I stamped the images onto watercolor paper, sprinkled with emboss powder, and heat set.  

Next, I used the water based markers to watercolor each image.  I worked in one small area at a time using  a combination of direct and in-direct methods to fill in color.  For the direct method, I colored directly onto the paper with the markers and then spread the color with a water brush, starting in the lightest area - and always starting with a clean brush.  In very small areas, I colored just a small amount and left part of the area without color - that would be the "lightest" color that I started in. For the in-direct method, I scribbled the marker onto a pallet and picked up color with a water brush.  As with traditional water coloring, I wet the area first.  TIP: if you want more contrast, you can add a darker color after an area drys - this works with both methods. Be sure to still wet the whole area, so you don't get hard lines. After I finished coloring, I cut out the image.


I colored two of the buttons in the kit to match. 


I laid the image over lovely design papers and finished it off with embellishments - all from GF Card Kit 2 (Sku#4303). I used brads for earnings.


On the inside I stamped a sentiment that comes with the set on design paper and added a punched butterfly. I used a black pen to draw his antenna and dots on his body.


There are so many possibilities of colors and ways to use the new images.

Thanks for visiting!

Take care and STAY POSITIVE!