Sunday, November 30, 2014

Custom Box and Ornament Gift Tag

Today I'm sharing a fun design and directions to make a cute little box and matching gift tags.


I stated with making my own design paper. I sprayed color onto two sheets of Ultra Smooth Premium White Cardstock with Fireworks Sprays summer sky, danabe blue, grape jelly. The sparkle is so pretty!


After it dried completely, I stamped images from Sheena's A Little Bit Scenic - Ornate Snowflakes with Delicata Silver Shimmer Ink Pad.


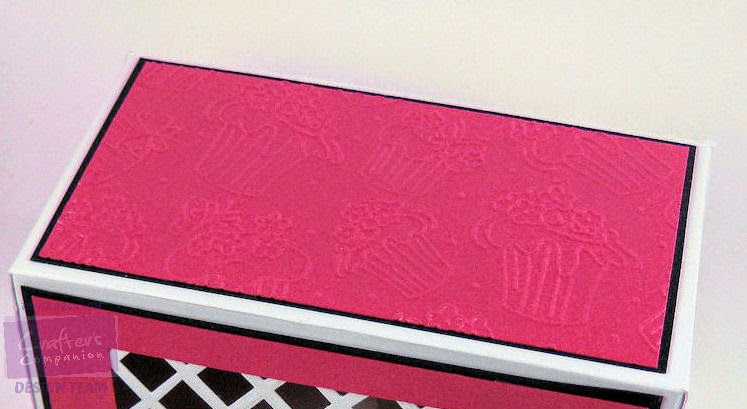
For directions on how I made the gift box using The Ultimate Tool, see my post here. There are several size gift boxes you can make with the tool. I trimmed off a portion to fit the gift. I also scored in horizontal direction to give some interest. 


I adhered the sides with Red Liner Tape. The lids were made with Shimmering Cardstock sky blue.

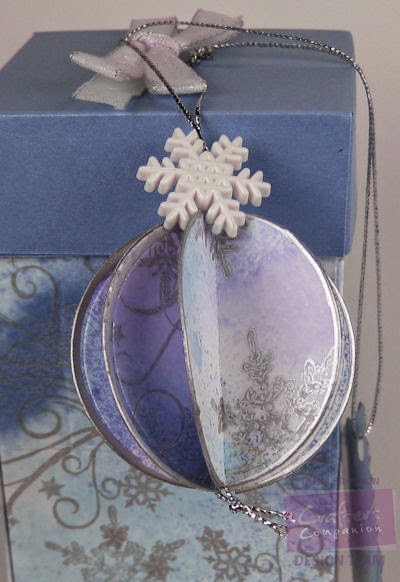
To make the ornament, I cut eight circles with the 1,7" circle using Die'sire Essentials Dies - CirclesI folded each circle in half with the right side inside, scored it with the Double Ended Scoring and Embossing Tool that came with The Ultimate Craft Tool, and edged them with a silver metallic leaf pen. 


I adhered them together - two circles at a time by placing Collall All Purpose Glue the un-stamped side. I did this for 4 circles each to create two "halves." I put a clothes pin on each half to hold them in place. After they dried,  in the center of one half, I laid down a line of glue and positioned a piece of twine with a little snowflake embellishment I found in my stash, and then glued the two halves together make the round ornament.  I used a couple clothes pins to hold them together until it dried.


I cut a matching scalloped tag with Die'sire Essentials Scalloped squares and added both tags to the top lid along with a perfect bow I made with The Ultimate Tool


Shout out: My ornament gift tag was inspired by this video from Dina.

Crafter's Companion has had several new releases. For more ideas, be sure to pop over to the Crafter's Companion Information Blog, as well as visit the Crafter's Companion Education  and Inspiration Team members.  You can see their latest designs by clicking on the names on the left side of my blog.

Thank you for visiting!!

Take care and STAY POSITIVE!


Thursday, November 27, 2014

Die Cut Windows

My design today features one of the newly released  Die'sire Decorative Die sets. 


 I used the Die'sire Decorative DiesForget Me Not~Myosotis. to create the flower windows through the front of a Shimmering Card pearl black. 


Next, I created the colorful layer with Spectrum Noir Ink Refills
BT1, LV3, TB5, BT9 on High Gloss Cardstock. I used High Gloss Cardstock Unscored - 8.5" x 5.5" - pre-cut sheets makes it easy to do just one cut to perfectly fit inside my black layer. I sprayed alcohol, then dripped in color. I spritzed again, tilted the cardstock around and "kissed" another piece of cardstock to spread and blend the colors. 


The sentiment is from Sentimentals EZMount Stamp Set - Love is all you need. I stamped it with Memento LUXE Ink Pads wedding white, sprinkled embossing powder and heat set.  


On the inside I folded a piece of High Gloss Cardstock Unscored - 8.5" x 5.5" to cover the inky backside and also provide an area for the note. Too carry the theme inside, I added a couple of the die cut flowers.


Crafter's Companion has had several new releases. For more ideas, be sure to pop over to the Crafter's Companion Information Blog, as well as visit the Crafter's Companion Education  and Inspiration Team members.  You can see their latest designs by clicking on the names on the left side of my blog.

Thank you for visiting!!

Take care and STAY POSITIVE!


Tuesday, November 25, 2014

All About Cupcakes

It's Black Friday All week at Crafter's Companion! We are celebrating with the fantastic new Cupcake Templates.  I just like word "cupcake!"  It warms my heart - I have wonderful memories of baking cupcakes with my mother. The templates make fabulous packages to present your cupcakes in, as well any item. My design today features the Cupcake Templates Collection - Twin Cupcake Presentation Box.  You can put one big cup cake in it.


 Or, two regular size cup cakes fit nicely in the tray.


I followed the easy directions that came with the template, using beautiful Construction cardstock - 12" x 16". I secured the template with EZRelease Tape before tracking it.  


I used The Ultimate Tool to score the dashed lines, folded them up and used the Scoring and Embossing Tool that comes with the tool to burnish down the folds for a nice crisp edge. To create special design paper, I ran the Embossalicious Cakes Galore through my eBosser on Shimmering Cardstock rose pearl. I laid on top of a layer of Shimmering Cardstock black pearl. I used Red Liner tape to adhere the sides of the box.


For the window, I used Die'sire Create-A-Card Dies - Ornate Lattice~Treillage Fleuri on Ultra Smooth Premium White Cardstock, layered the rose over black and added a layer of the two colors to the inside lid.


Next, I traced the inner cup cake tray onto a piece of the  Construction cardstock. I scored the dashed fold lines and burnished them, as above. For the holes I used the Die'sire Create-A-Card Die Forget Me Not~Myosotis. 


 The flower is cut from Shimmering Cardstock pink pearl using the Die'sire Create-A-Card Die Forget Me Not~Myosotis. I added a little shading to the pedals with Spectrum Noir Blendable Colored Pencils 034.


To create this cute little fence wrapper, which you can put around a cupcake, I used Die'sire Decorative Dies Picket Fence Cupcake Wrapper. My little happy cupcake was a bit too fat to fit into the fence, however he was quite happy to sit beside it. :)


Crafter's Companion has had several new releases. For more ideas, be sure to pop over to the Crafter's Companion Information Blog, as well as visit the Crafter's Companion Education  and Inspiration Team members.  You can see their latest designs by clicking on the names on the left side of my blog.

Thank you for visiting!!

Take care and STAY POSITIVE!