Friday, June 28, 2013

Domino Art

I used a few different coloring techniques to create these fun designs.


  To prepare the dominoes, I soaked them in bleach overnight. This step allows the ink to better adhere to the surface. It does dull down the domino a bit. This is good for a vintage look. If you want that sheen, you can add it back later - which is what I did on most of these designs.  All of these designs feature images from the Stamp It line at Crafter's Companion.

For the first coloring technique, I picked up color from StazOn ink pads with felt pieces and applied color to the domino. I used one color at a time. I started with the sides and then the front leaving a highlight. I also added color to the back.


Next I stamped the Statue of Liberty image from the Stamp-It Australia EZMount Stamp Set 69 - Around The World. I placed the image face side up and brought the domino down to it. I find this is easier to capture the exact part of the image I want onto the surface.  With this technique, you do not need to add a finish.


The second coloring technique uses Spectrum Noir Markers. I stamped the image first - face side up, as above. This image is from the Stamp-It Australia EZMount Stamp Set 70 - Lucious Landscapes.


Next I added a layer of clear medium. Before adding color with the alcohol inks, you need to put some type of finish/sealer on top of the solvent ink. They do not play well together. :o) After it dried completely, I used a combination of direct (coloring directly with marker) and indirect coloring (scribbled onto a non-stick palette and picked up color with a paint brush dipped in alcohol) to "paint" the little scene. TIPS: Be sure to let a color dry before coloring next to it. Use clean alcohol to clean your brush between colors and to add texture, such a clouds or water waves. Be to be careful not to use too much alcohol, it makes the color spread beyond where you want to end. If that does happen, no worries - this is a very forgiving technique. :o) Wait until it dries, then go back over with the color you want to correct it.
I allowed the domino to dry and then added a thin layer of clear medium to seal in the colors.  Spectrum Noir Colors used: BT4, CG3, DG3, EB3, GB7, TB3.


For the third coloring technique, I dropped  Spectrum Noir ink onto an Alcohol Ink Applicator, spritzed the applicator with alcohol and tapped color onto the domino. NOTE: The dropper tops of the ink refills work great for this technique! I tapped until I was happy with the colors.  I have to admit, this one was the most fun!  That's why I made so many. :o)

domino 1: CG1, TB4, PP4


domino 2: clean felt FS5, HB2, PP4


domino 3: did not change felt, added CG3, TB4, TB5. Spritzed more alcohol onto felt and tapped again to spread color.


domino 4:  did not change felt, after tapping, spritzed domino with alcohol


domino 5:  did not change felt, spritzed domino with alcohol then tapped


I allowed each domino to dry and added a thin layer of clear medium before stamping.  After stamping, I allowed each domino to dry and added a thin layer of clear medium to seal everything.

I used images from:  Stamp-It Australia EZMount Stamp Set Spring - Dreamy Daisies (colored with CT4, DG4), Stamp-It Australia EZMount Stamp Set 62 - Time To Dream, Stamp-It Australia EZMount Stamp Set 24 - Oriental Delights


NOTE: Be sure to work in a well ventilated area as the alcohol scent can sometimes be strong.

Crafter's Companion has had several new releases. For more ideas, be sure to pop over to the Crafter's Companion Information Blog, as well as visit the Crafter's Companion DT members.  You can see their latest designs by clicking on the names on the left side of my blog.

Friday, June 21, 2013

New Brambly Hedge Release

Today, I'm featuring images from an upcoming new release of Brambly Hedge


 They are so cute!! The images on my project are from the Winter Story set. I stamped the images onto Ultra Smooth Premium White Cardstock for Alcohol Markers and colored them with my Spectrum Noir Markers. I used a combination of direct coloring to the cardstock and also pallet coloring - scribble color onto an acrylic block and pick up with a lighter color. As you lay the color on the cardstock, a natural blending occurs. 

TIPS: When you are coloring in a small area, dot the color in lightly - the harder you press the more ink will go onto your paper. You'll get a smoother effect when you build color. Leave highlights of the lighter color by not fully coloring over the whole area with darker colors. One of the beautiful features of the Spectrum Noir markers is that they will blend with little effort.  For highlighting snow, lay down color and then use the blender marker to soften the line.


scarf: CR5, DR3, DR7
ears, pipe, tail: CT1, CT4, GB3, GB4, GB5
pocket contents:  CT4, EB4
buttons: IG7
snow: IG1, blender

Next, I sponged in snow with a light blue ink pad and added IB1 and blender to the snowmouse.


After trimming around the snowmouse and snow I adhered the layers to the base card. I added acrylic paint for falling snow.


On the inside I added a sentiment from the set. I left the die cut in place after cutting it out and sponged some ink.


Here's a photo of all the SN colors I used:


Crafter's Companion has had several new releases. For more ideas, be sure to pop over to the Crafter's Companion Information Blog, as well as visit the Crafter's Companion DT members.  You can see their latest designs by clicking on the names on the left side of my blog.

Monday, June 17, 2013

Sheena's New Release - A Little Bit Festive and Blog Candy Winner

Sheena's new release is coming!  It's all about winter. I know, I know...it's only June! :o)


These images are from the Snowy Wellies set and will be available soon at Crafter's Companion. I stamped the boot image twice onto Ultra Smooth Premium White Cardstock for Alcohol Markers and colored them with my Spectrum Noir Markers. I used a combination of direct coloring to the cardstock and also pallet coloring - scribble color onto an acrylic block and pick up with a lighter color. As you lay the color on the cardstock, a natural blending occurs.  To see a video of this method of coloring, click here.  I colored the black boots, snow and sled on the base image, and colored and cut out the green and red boots from the second image.


Boots: DR3, DR5, DR7, CT1, CT4, GB4; CG2, CG4, JG1, JG7; IG4, IG8, IG10
Sled: TN2, TN4, TN6, GB4
Snow: 0, 1B1

To help the snow glisten, I used a glitter pen. 


On the inside, I included the sentiment from the set on matching layers. 


Here's a photo of all the Spectrum Noir colors I used on this project:


Crafter's Companion has had several new releases. For more ideas, be sure to pop over to the Crafter's Companion Information Blog, as well as visit the Crafter's Companion DT members.  You can see their latest designs by clicking on the names on the left side of my blog.

Blog Candy winner


Thank you so much for your nice comments and for sharing your favorite Ai images.  The winner is comment is from Caryn S.
----------------------------------
Caryn S said...


I love the Girlfriends sets, probably like a lot of people. My favorites of this collection are Party Girls and Picture Perfect, I can't decide which one of these images I like more!

Friday, June 14, 2013

Crafter's Companion & Papercraft Planet Sketch Challenge

 Today the Crafter's Companion Design Team is excited to play along with  Paper Craft Planet for their weekly sketch challenge and we would love to have you play along too.  Here's the fun sketch and you can find more info on the PCP Blog too!  If you would like to play along, upload your card to the PCP Gallery and tag it with SK061413.


YES ~ there is a prize!!!  For each comment left on the blogs listed below, you will be entered into a drawing for a $20 gift certificate.  ALSO, if you play along on our sketch challenge, you will be entered into the drawing again (just make sure you upload your card to the PCP Gallery with the tag listed above).   Deadline to enter your comments and/or sketch challenge cards is June 21, 2013 at midnight (ET).


Now here's who is playing along with us today ~ don't forget to leave some love for your chance to win the Crafter's Companion Gift Certificate!

Stacy Harper-Watson -- http://scrapwithstacy.blogspot.com/
Trena (me!) Brannon -- http://trenastampinhq.blogspot.com

Now, to share what I made for the challenge.  For my design, I'm featuring images from  Sheena's A Little Bit Scenic - French 50s Cafe set.


I stamped the images onto Ultra Smooth Premium White Cardstock for Alcohol Markers and colored them with my Spectrum Noir Markers. I used a combination of direct coloring to the cardstock and also pallet coloring - scribble color onto an acrylic block and pick up with a lighter color. As you lay the color on the cardstock, a natural blending occurs. Next, I cut out the images with a die cut, left the image in the die cut and used a blending tool to add a blue ink frame.


As a finishing touch for the glass items on the table, I used a clear dimensional medium.


TIP: to save on cardstock/paper cut your matching layer out of a layer that will be covered up. :o) 


To see great ideas, techniques, tips and color inspiration, please visit the Spectrum Noir BlogCrafter's Companion has had several new releases. For more ideas, be sure to pop over to the Crafter's Companion Information Blog.

Thursday, June 13, 2013

Embossalicious!

Today Crafter's Companion is very excited that Splitcoast Stampers is doing a Product Feature on the Crafter's Companion Embossalicious Embossing Folders!  We're are excited to spread the word on these wonderful little treasures of the crafting world!  The various size folders are great for greeting cards and scrapbook pages. My design shows how to use it on a greeting card. 

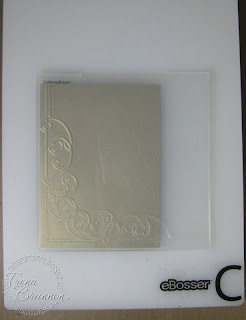
Here's what I created using the 6" X 6" Embossalicious Embossing Folder - Regal Corner folder! 


I'm also featuring Sheena's Floral Fantasy EZMount Stamp Set - Bluebells & Daffodils as the focal point. I'm really digging her latest Floral Fantasy designs!  

I started with the embossed background layer. I cut the cardstock to A2 size, placed it in the corner of the embossing folder, and ran it through my eBosser


Next, I stamped the daffodil images from the set onto water color paper, sprinkled emboss powder and heat set.  I colored them with Tombows Dual Brush Pens, using the direct method of applying color and cut them out.


Do you have a favorite Embossalicious embossing folder? Head over to Splitcoast Stampers to find out how to get a discount off your next embossing folder purchase with Crafter's Companion. Submit your favorite card made with the Embossalicious line of folders in the SCS gallery, using the tag CraftersEmbossing.

Tuesday, June 11, 2013

More Graduation Cards and Blog Candy!

I've been designing more graduation cards! We know so many people graduating - from high school and college and we are proud of all of them! 


To see the details of how to make this cute money/gift card holder, click here

To help celebrate graduations everywhere, I'm giving a way this adorable Ai This is Huge Set (Sku#4288) for you to make a special cards!!


To get in the random drawing:

1. Please leave me a comment telling me your favorite Ai image/set by June 16th 6pm central
2. Be a follower of my blog
3. Have a USA address

On Monday June 17th, I'll share the winner's name. 

Thanks for visiting!

Take care and STAY POSITIVE!

Friday, June 7, 2013

Pink Ballerina

My design today features images and design papers from the Crafter's Inspiration Spring Edition, which is on sale!


 I started by stamping the adorable ballerina which comes as part of the clear stamp collection in the kit. 
I stamped her onto water color paper and colored her using water based markers and a water brush. I used a combination of direct to paper coloring and in-direct - scribble marker onto palette and pick up color with a water brush.  After coloring, I cut her out.


I added layers to the base card using design papers in the kit and stamped the ballerina onto the top layer - this allowed me to know where her feet will land and I colored a "floor" in with N60 and N00.


The kit is jam packed with great stuff for over 65 projects, including:

CD containing elements from the following ranges:
• Party Paws • Angelica and Friends • Crisalis • Meadow Cottage Bears • Mulberry Wood Everyday • Morehead • Sheena Douglass • Plus exclusive SVG files to use on eCraft

Papers from
• Party Paws • Angelica and Friends • Crisalis • Meadow Cottage Bears • Mulberry Wood Everyday • Moorehead • Sheena Douglass

Stamp set with designs from
• Angelica and Friends • Meadow Cottage Bears • Sheena Douglass

Plus
• Embossalicious embossing folder • Shamballa style faceted bead bracelet kit

Techniques covered inside the magazine include:
• Stamping • Embossing • Beading • Decoupage • Colouring • Die-cutting • Box-making • And much more

Over 65 inspiring projects

Crafter's Companion has had several new releases. For more ideas, be sure to pop over to the Crafter's Companion Information Blog, as well as visit the Crafter's Companion DT members.  You see their latest designs by clicking on the names on the left side of my blog.

Thursday, June 6, 2013

Art Impressions Challenge - Fabulous Brads, Eyelets and Gems

For the current Art Impressions Blog challenge they are doing a cool product swap with  Eyelet Outlet.  I designed a fishing scene that I believe captures the sport. :o)


 I stamped the main image from the Catching Zs Set (Sku#4161) and masked him using both tape (larger areas) and liquid (very small ares). Next, I stamped the Creek (Sku#i1492) and Sm. Forest (Sku#E692) in the background.   For the trees way off in the distance, I used a paper towel to mask and stamped the top port of the forest set. Before removing the liquid mask, I dabbed a tissue over it to remove the ink and the pulled it off - to start it, I used an adhesive remover.


Next, I added color with Copic Markers.  I added grass from the WC Foliage Set (Sku#4051). I stamped a little pot from the WC Series 6 Set 2 (Sku#3498) for the fish to sit in.


I laid the Trout & Bass Brads on top of the little scene and thought about placement and where I needed to put the holes for the brads. I used a push pen to make the holes so I could see exactly where I was putting them. I added the sentiment from the Z's set. For final touches,  I used a glitter pen to add a little sparkle in the water, a glaze pen to highlight the little worms eyes, and a multiliner pen to create a slash from the fish jumping to get the worm.


Please pop over to the Art Impressions challenge for this week to see a bunch of inspirational ideas using brads, eyelets and gems!  You can enter for a chance to win a coupon!!

Thanks for visiting!

Take care and STAY POSITIVE!

Tuesday, June 4, 2013

Wiggle Your Toes in the Sand

My Design today features a different style of graduation card - not your traditional card. 


I know what you're thinking - that doesn't look like a graduation card. When you read the words on Island Window (Sku#M3178), you see that it is - Wiggle your toes in the sands of the Sea, dream of tomorrow and all that can be. I love those words!  A dream is where it all starts - our ambitions, the choices that we make - they are driven by our dreams and that's why I dig this image for a graduation card! To color this image, I chose Tombow Dual Brush pens. They work great on smooth coated card stock.

 I love the bright colors of the image at the Ai website and used it as a color guide.  Using the guide and the color chart I created with the dual brush pens on Cryogen cardstock, I jumped into coloring. I colored direct to paper and also used a palette to achieve a smooth blending of colors. For palette blending, I scribbled a brush pen of darker value down and picked up color with a pen of lighter value.


After coloring the image, I trimmed around the words. 


Those beach chairs needed some shade, so I added a Beach Umbrella Brad. Once I figured out the placement for the umbrella, I used a push pen to make a hole so I could see exactly where I was placing it. I could then see that the umbrella should be behind the flowers in the foreground . I used a craft knife to cut around the flowers.


There's still time to get in on the "Use Brads or Eyelets" Eyelet Outlet Product Swap! challenge at Ai!!


Thanks for visiting!

Take care and STAY POSITIVE!