Thursday, May 31, 2012

One more Beer....


This is Rhonda with Hat. She just cracks me up. :o) I made this card for the AI challenge this week - Seeing Spots.  My card was inspired by Maria's card for the challenge. You can see Maria's card, and all the Design Team's lovely creations, at the Art Impressions Blog.

I stamped Rhonda onto Cryogen card stock with Memento black ink. I used a multiliner to extend the bar a little. I colored her with my Copic Markers. I stamped her middle two more times on BasicGrey design papers and cut out her out fit. I colored her with my Copic Markers. I used my computer to make the little sentiment - I needed a saying with spots.  I just dig her expression and posture! There's so many things she could be saying. :o) AI has a nice selection of words and sayings that go great with Rhonda.  I used Liquid Applique to give the beer head dimension.


Take care and STAY POSITIVE!

Wednesday, May 30, 2012

Girlfriends Doing What Girlfriends Do

Sharing some fun cards I did! Click on the cards to see more information on how I made them.

Here are Girlfriends just living life!


Also sharing some designs and fun techniques I did with Judi-Kins Images.


Take care and STAY POSITIVE!

Tuesday, May 29, 2012

Bon Chance


I am really digging Sheena's new designs!  The images are great for little scenes and the the style works well for clean, fresh designs.

For this Good Luck card, I stamped onto Ultra Smooth Premium White Cardstock for Alcohol Markers.  I used a combination of direct coloring and a  "watercolor" technique to add color.  I scribbled my Spectrum Noir Markers onto a a piece of plastic.  Spritzed alcohol next to or in the color and picked up color with a paint brush.


If you want a stronger color, spritz next it the color and roll your paint brush into the alcohol before picking up color. For a more subtle color, spritz directly into the color.   Since this is alcohol, it does dry quickly, so you'll be spritzing often. :o) For the ground,  I used short horizontal strokes in a scribbling motion. I really like the texture the paintbrush creates.  After masking the building and ground, I used HB1 in my Copic Airbrush system to add color to the sky. 


NOTE: The color that's hard to read is the blender pen. I used it to smooth edges in the windows. 

Today is my day at the Crafter's Companion Information Blog.  Each day the Design is sharing ideas and inspiration. The Crafter's Companion Challenge Blog has even more!  Both sites are having a huge give a away this month. Be sure to visit!!

Take care and STAY POSITIVE!

It's Fun Mowing the Lawn


That's what I think of when I see this happy Lawn Ranger. I used Copics to color him in.
I stamped him first, masked him with Eclipse masking tape and then stamped the fence.  I would say this fence is a must have. :o) I use it all the time (you'll see)!  It's goes great with all the Fronts & Back images. I'll share a scene next week with the fence and a Front & Back image and you'll see how easy and fun they work together! 

To create the sky, I left the mask over him, added a miask for the fence, and then airbrushed B23 over a cloud template (Stampin' up!).  After I removed the masks, I drew in part of the fence by his legs.  For the grass, I filled in light horizontal strokes of green, and then used the brush tip to flick up  grade blades.  C5 made a nice shadow under his lawn mower.

I stamped a partial image inside.  He just has such a great smile! :o)


Copics:    multiliner 0.03, 0 , B91, B95, BV02, BV04, G40, G82, R21, Y11, Y15, YG00, YG05, C1, C3, C5, C7, E00, E02, E11, E17, E31, E35


Take care and STAY POSITIVE!

Thursday, May 24, 2012

ummm...May be time for a New Doctor


If your doctor says to you, "If all else fails, manipulate the data," you may want to think about getting a new doctor.  :o)   This week's Art Impression's Blog Challenge is all about Getting Well.  You can enter  (two times!) into the challenge for a chance to win a coupon!

I stamped  Doctor Bill onto 140lb cold press watercolor paper with a Versafine onyx black ink pad, added black detail emboss powder and heat set.  I used the direct to paper method of coloring with Tombow Dual Brush Pens. I colored within one embossed area at a time and spread the colors with a waterbrush.  Depending on the size of the area, I'll use two - three shades of color to create shading and contrast.

The design paper is from Bo-Bunny Designs.   I fussy cut Doctor Bill out after I colored him and adhered him to a piece of white card stock cut out with a a Spellbinders Nestabilities die cut.   The sentiment is called Manipulate the Data.   On the inside, I added a little sign that hangs outside Doctor Bill's office. It's from the Beauty Salon set.

Tombow colors used: N15, N95, 443, 452, 491, 899, 912, 947.

Take care and STAY POSITIVE!

Wednesday, May 23, 2012

Winner of Week 3!

 The Boxer and Envelobox Creator Bundle with Advanced Techniques DVD
The winner of The Boxer and Envelobox Creator Bundle for Week 3 is Linda Kirsch:

Linda Kirsch said...
Wow, how clever is that! I am going to have to try that one some day! Thanks for the chance to win this great prize too. Yep, I am a follower of all three!
May 16, 2012 2:06 AM

Congratulations Linda!! Please email your address to me at: tlynn@wideopenwest.com. Thank you!

Take care and STAY POSITIVE!
Trena

Tuesday, May 22, 2012

One-of-a-Kind Background

 
Each week in May the Crafter's Companion Design Team will be giving away a wonderful prize from Crafter's Companion on their blogs - this is the last week!!  All the DT blog links are posted on the bar to the right.  Be sure to read the rules for each team member's giveaway.   This week I have added one more step!

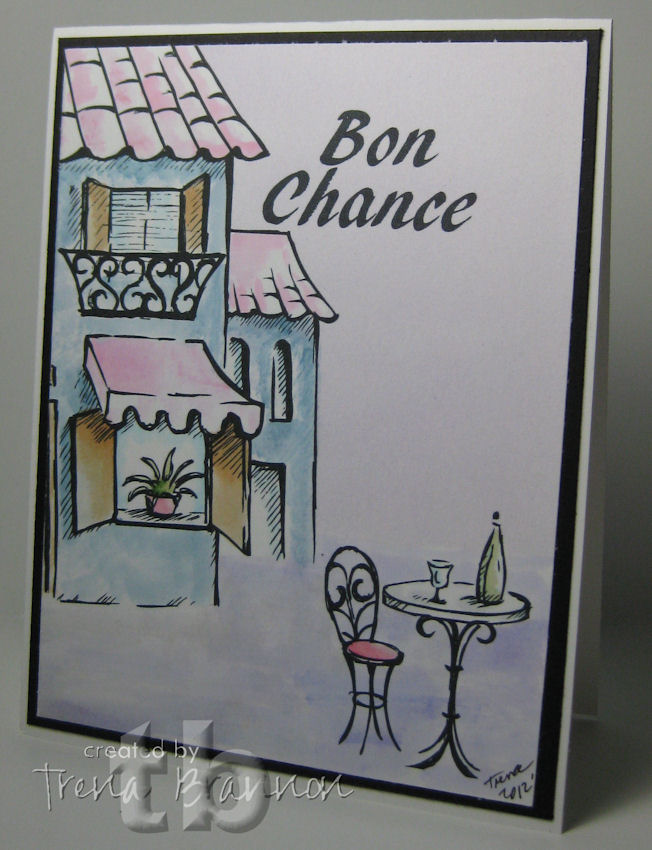
For my project this week, I'm sharing another cool background technique with one of Sheena Douglass's new designs. I'm really excited to play with Sheena's new images!  You'll get to see several projects over the next few weeks, so be sure to come back right here each day!

I pulled out my iron - my Encaustic iron that is.   Have you ever tried it?!  Stacy shared a project last week with a really cool frame that looked like it was painted with wax - you can see it here. I tried it last year at a stamping retreat and fell fast for it. My stampin' sister Barb G showed me how to use it and gave me lots of tips.  I had ordered the started kit before the retreat was over. :o) I'm sure you have those dear friends - enablers - that help you spend your arts & craft allowance. :o)

There's two styles of Encuastic painting that I know of, (1) using paint brushes and tin tubs of heated wax, and (2) using an iron and small pieces of wax directly onto the iron.   There is a short learning curve to producing some really cool one-of-a-kind backgrounds.   That's what got me excited!

I used semi-glossy card stock - the wax glides smoother with some type of glossy finish.  You can also use other type papers and card stock.  To stamp you can use StazOn or a dye based ink.   While I was stamping, I stamped several.  When I'm using my iron, I like to spread a lot of wax at one time and have them ready for a project.  I may use them for a background or cut out the image.


Before spreading color, I use a layer of Beeswax to coat the card stock. Next, I chose wax colors that are in sun flowers, melted them together on top of the iron and spread onto the background.  Another tip Barb G taught was to use metallic crayons with your wax to get a cool bubble/sparkle effect.  After spreading the background,  I came back in with my stylus brush and spread a little dark brown wax in the center of each sunflower.  I gently buffed with a tissue when I was finished.


Next I fussy cut one of the sun flowers out and trimmed a rectangle around the remaining ones. 


On the inside I added a strip of the design card stock and punched out a couple butterflies with my Martha Stewart butterfly punch.


Here's what the iron, stylus, and wax look like:


The card is ready to send!  If you don't want to invest in the tools yet, try a craft iron and crayons - same idea.  You can get a feel for thrill. :o)

To see more Encaustic painting that I've done, please visit here.

Here are the rules for my last week's giveaway:
  1. You MUST be a follower of BOTH the Crafter's Companion Informational blog and of the Crafter's Companion Challenge blog. (I do check when choosing winners :o)).
  2.  Be or become a follower of my blog.
  3. Post an announcement on your blog about Crafter's Companion Giveaway with a link to your favorite Crafter's Companion's  post so far this month (it does not have to be mine - all the DT's designs are awesome!).
  4. Leave a comment ON THIS POST by THURSDAY, May 31st at 8pm PST. Winners to be announced the next day on Friday the 1st of June.
Week three giveaway ends May 22nd - Please make sure I have your email address!  I will send you an email when you have won and post your name on my blog. The winner will be announced on Wednesday.

Week 4 Giveaway is A CleverCut 3-in-1 Mini Paper Trimmer.

CleverCut 3-in-1 Mini Paper Trimmer
http://www.crafterscompanion.com/CleverCut-3-in-1-Mini-Paper-Trimmer_p_27.html


Thank you for visiting!!

Take care and STAY POSITIVE!
Trena

A Day at the Beach


Last Tuesday they were sipping coffee at the cafe; this week they are sipping cocktails on the beach!  Girlfriends are on the move! These lovely, leisure ladies are from a set of four, you can also get the image individually. 

I colored the girls with Copics Markers and fussy cut them out.  At this point I was not sure how much I wanted to cut away from the main image so I cut out around the whole thing.  Remember, you can always cut more.   Now, I have to admit... I have cut off a limb or two, and adhered them back together. Not very pretty. :o)

I stamped the girls on the background for placement and drew a pencil horizon line.


I masked the bottom and airbrushed B23 for the sky, using a cloud template (made with a scallop punch). I next masked the top and airbrushed E31 for the sand.  I made several little random dots.

I colored directly onto the wc three palms image with water based markers and stamped onto the background.  Since the placement image was stamped there, I can see where the trees would come up  behind them.  Next, I used a craft knife and mat to cut out all the pieces of my colored image I didn't want. TIP:  Don't try to fussy cut the thin lines. Cut out out the larger parts of the image. You can use the placement images lines.


Only thing left was to adhere all the layers.  I used a liquid glue to adhere the girls  because it allows for more drying time - I can lightly shimmy the piece into place before pressing down. Plus, you can get the liquid glue in the little bitty places. :o)   I added the full palm image inside. I think it adds a special touch when you carry the outside into the inside.


Please check out my Crafter's Companion Post for prizes!!


Take care and STAY POSITIVE!

Thursday, May 17, 2012

Floating Along....


This little scene was inspired by a card that Dina did.   Truth be told, I bought this adorable floaty penguin stamp because of the card she did. :o)  I thought he looks sooooooooo comfortable.  The colors of the scene are inspiration for this weeks Art Impression Challenge.  I wanted to use my Spectrum Noir Markers so I took out my combo chart to decide which markers I needed.   I didn't have the matches identified, so I played around with some colors and found the combos that match!  You can see my full combo color chart by clicking on the chart on my side bar.

I stamped on Cryogen card stock with a Memento tuxedo black ink pad. I also used Eclipse tape to make a mask. I knew I was going to air brush the beach and water. 


My Spectrum Noir Markers fit into my Copic Air Brush system. I was very happy about this discovery! :o)  I masked my little guy and airbrushed the sand with TN1 and the the water with BT4 and BT9. I added several dots for sand with TN1 and TN2.   Following Dina's lead, I used a white gel pen to add a few ripples in the water.

I signed my little scene, adhered the layers and stamped the image onto a piece of white card stock for the inside. He is ready to send!

Some people ask me which do you like better - your Spectrum Noir or your Copic?  I don't have to choose! Both have quality ink, vivid colors and are refillable.  I enjoy both and find that I can use them individually AND together in my coloring! I love options!! :o)

Please pop over the Art Impressions Blog and join in on the challenge!! You'll have an opportunity to win a gift certification from Art Impressions!

Take care and STAY POSITIVE!
Trena

Wednesday, May 16, 2012

Winner of Week 2!

Thanks A Bunch

The winner of the 2nd week- a set of Rock a Blocks and the popcorn bear set !! for Week 2 is Caryn:

Caryn S said...
I love this stamp every time I see it! I love that you selectively inked and stamped for the image on the inside.
May 8, 2012 7:14 AM
Delete

Congratulations Caryn!! Please email your address to me at: tlynn@wideopenwest.com. Thank you!

Take care and STAY POSITIVE!
Trena

Tuesday, May 15, 2012

Good Friends, Good Coffee


This is my first post as an Art Impressions Design Team Member! I'm so excited! I'll be sharing right here on Tuesdays! I have been a customer of AI and a Bonnie groupie for a long time. I get so many ideas from her videos!  I had the opportunity to meet Bonnie and Kendra last year when they did a class at Creative Cuts and Crafts in Elmhurst, IL.  Bonnie will be doing another class there in July. You can visit the store's website for more information.


One of my favorite things to create are scenic greeting cards. Since last week's challenge was around beverages, I made a card featuring coffee - a drink I have every morning.  It's extra special when I share my cup of coffee with my girlfriends.  In this little scene, the girlfriends are sitting outside a lovely cafe, where they bought their ice coffees, planning a day of activities - of course, shopping and lunch will be on their list. :o) This card features one of the new Girlfriend sets,  Girlfriend Blend. The background includes giant oak tree, wrought iron gate, and cafe


I stamped the girls onto X-press card stock with a black memento ink pad and then colored them with Copic markers. For some added detail, I used a Copic multiliner to give a design to one of the Girlfriend's shirts, and used a Sakura glitter pen for their lipstick. I fussy cut them out.

Next, it was time for the background. I placed the Girlfriends on my blank background and marked where their table would be, and then set them aside again.  I masked the table and stamped the cafe.  I then masked the left side of the cafe and stamped the first tree. I drew lines for the grass and side walk. Time for coloring the background (perhaps you can tell, I love to color!!)! When I was all finished coloring, as Bonnie tells us, I signed my little scene. 

For an added little touch, I  stamped one of the cups onto some scrap paper, colored it, fussy cut it out and adhered to the inside of the card to carry the theme forward.   It's ready to write a note and send off!


Here's a photo of all the Copics I used:


Please be sure to visit the Art Impressions Blog. The DT will have some more ideas for you!! 

Take care and STAY POSITIVE!
Trena

Cool Technique for a Masculine Card


Each week in May the CC Design Team will be giving away a wonderful prize from Crafter's Companion on their blogs.  Before I tell you what the prize is for this week, I'll share my project. I hope you'll be inspired by it as you speed scroll down to the prize. :o)

This design was inspired by a technique I saw my CCDT sister Marge do.  We sat next to each other at a retreat last week and we had a good time coloring and visiting for three days.  This is a very simple version of what Marge did. Her designs were on 8 1/2 x 11 size card stock and involved more stamping. They turned our beautiful! I am creating a smaller version.

I was looking to create a masculine card - I have a few more to do for Father's Day. I started by inking up the  Stamp It Valued Time image with a StazOn jet black in pad and stamping onto semi-glossy card stock. Note: Many times, I will stamp for two or more cards - might as well take advantage of all the supplies out. :o).


I used Tim Holtz distress ink pads and a stylus to add color. Note: you could use a sponge also. After laying down my first layer of color, I masked the clock face. I was planning to add a lot of color and wanted to keep the clock face light. I could say I laid the color down first then masked so that the face would not be a stark white. The truth is I forgot to mask before I did my first layer. :o)


Next, I built up layers of color. Using a very light stroke and starting at the outside edge, I pulled color in, leaving some light around the words and clock. The distress inks stay wet a little longer than dye inks which allows for blending on the semi-glossy card stock.  NOTE: As you can see from the photos, the image was stamped sharp.  I think as I added color and left light in the center, it makes the image almost look 3-D.

After the ink dried, the last step was to add some lines and shapes with a white pen. I used a template and a Sharpie poster-paint pen. You can also use a compass and a white gel pen.   Marge has taught me over the years, "know when to stop!" :o)


All that was left, was to allow the white paint to dry, remove the mask, and adhere my layers. I stamped a light clock inside and was ready for a note and to send to someone special!

-----------------------------------------------------------
I'll announce the second winner on Wednesday. You can comment on last week's post until midnight pacific May,15th.  You can also visit all the DT members - Their links are posted on the bar to the right.

Here is the third week's:

Week 3  - The Boxer and Envelobox Creator Bundle with Advanced Techniques DVD.

 The Boxer and Envelobox Creator Bundle with Advanced Techniques DVD


Here are the simple rules for my week giveaway:
  1. You MUST be a follower of BOTH the Crafter's Companion Informational blog and of the Crafter's Companion Challenge blog. (I do check when choosing winners :o)).
  2.  Be or become a follower of my blog.
  3.  Leave a comment ON THIS POST to be entered in this week's giveaway
Week Three giveaway ends  May 22 - Please make sure I have your email address!  I will send you an email when you have won and post your name on my blog.


Thank you for visiting!!


Take care and STAY POSITIVE!
Trena

Saturday, May 12, 2012

Starting Tuesday...

Hi!!
Starting Tuesday I'll be sharing projects for a new Design Team I'm on!! I'm so excited!!!!!!  Here's a huge hint.... :o)


Take care and STAY POSITIVE!
Trena

Wednesday, May 9, 2012

Winner of Week 1!!

 
The winner of the Crafter's Companion Ultimate tool for Week 1 is Teresa Godines:

Thanks for the chance. Loving your projects.
May 2, 2012 4:59 PM

Congratulations Teresa!! Please email your address to me at: tlynn@wideopenwest.com. Thank you!

Take care and STAY POSITIVE!
Trena

 
Delete