Thursday, October 11, 2012

Art Impressions Challenge - Child's Birthday


This week's Art Impressions Blog challenge is Child's Birthday.

Sharing another Front and Back card to celebrate a special birthday.  I started with the idea that this would be a card for a little boy, but actually it will also work for a little girl who digs dragons!


I stamped this cute, friendly dragon onto Cryogen and also on a piece of design paper. I stamped the block birthday image onto design paper.

I colored, cut and glued the design pieces onto the dragon. Next, I had to think about placement, considering how much of his face will show on the inside. I laid my pieces over the front of the base card, trying different size die cuts to see what would work. I used a pencil line to mark where the die cute will be set.


On the outside I drew in a frame with dots and added a ground for the dragon to stand on. On the inside I placed the block birthday design paper - I lightly colored in the letters. To give the dragon texture,  I dabbed the Copic 0 blender pen in several random spots. 


List of Supplies Used:
InLinkz

Please pop over to the Art Impressions challenge for this week to see a bunch of inspirational Child's Brithday ideas!  You can enter for a chance to win a coupon!!

Thanks for visiting!

Take care and STAY POSITIVE!

Trena
--------------------------------------------------------------------
  

Tuesday, October 9, 2012

Fall Leaves


Happy Tuesday!! Trena here with more techniques you can use with your Spectrum Noir Markers and ink refills! Today I'm featuring Sheena's A Little Bit Sketchy Stamp Set - Autumn Leaves and one of the new Embossing Folders released last week.

I started with the background. I first embossed an A2 size if Ultra Smooth Premium White Cardstock for Alcohol Markers. Then it was time to add color! This is my new fun way to add color fast!! I poured rubbing alcohol into mini misters and then added Spectrum Noir ink refills. I started with a half full dropper and tested on scrap paper to see if I liked the color. To make the color more intense, I added a few more drops then tested again.  I used four colors for the background - CT1, CG2, OR1 and OR3.  NOTE: Make sure you are working in a well ventilated area. The smell of alcohol can be strong at times.


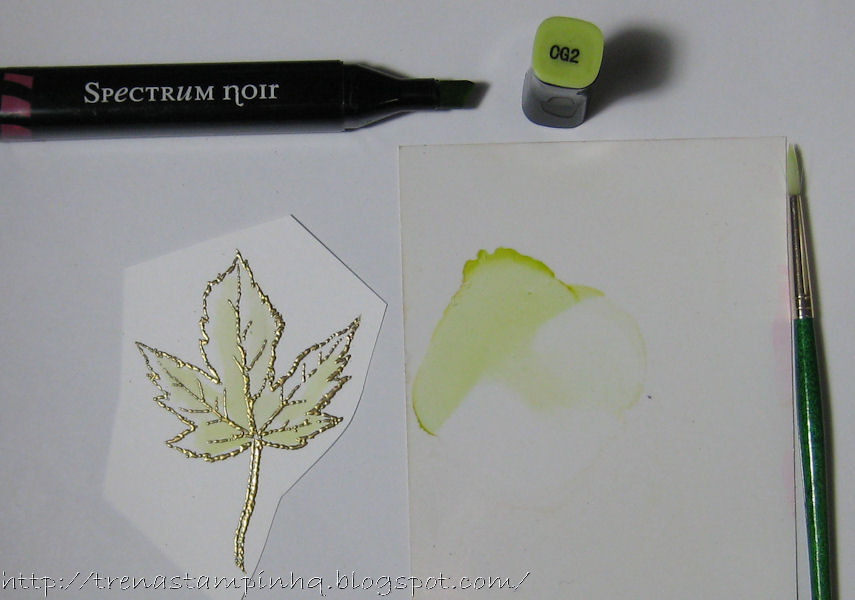
Next, I inked up the leaf image with metallic ink pad, sprinkled gold embossing powder and heat set.  I did the same for the little nut.   I scribbled markers onto a non-stick surface and spritzed with alcohol. I used a paintbrush to pick up color and paint the leaf.  I started with one color at a time. I used the same colors I used for the background.


For the inside, I added a small strip of the background layer and stamped the sentiment and a couple other small images that come with this lovely set.


List of Supplies Used
Stamps: A Little Bit Sketchy Stamp Set - Autumn Leaves
Paper:  Ultra Smooth Premium White Cardstock for Alcohol MarkersStampin' Up! metallic
Ink/ColoringSpectrum Noir Markers, ink refills, Encore Ultimate Metallic gold ink pad
Accessories: Embossing Folder, 91% rubbing alcohol, mini misters,  Stampin' Up!  gold detail emboss powder, Spellbinders Nestabilities
Thanks for visiting!

Take care and STAY POSITIVE!

Trena

Sarah's Business

This week I want to introduce you to Sarah.  


Sarah is just chillin', working her business - selling vegetables. She has the sweetest smile on her face. To me it looks like she's dreaming. I think she's dreaming of how big her business is going to be!

First I colored Fronts and Backs Sarah and the stand. Next I cut them out. I also cut around her elbows so that she would be able to place them on the stand shelf. I used a black marker to line around the edges. I do that with all images I cut out.


Since Sarah's back is the larger piece, I arranged the inside first. I used a light pencil mark to show me where the back side of the stand should be placed. After adhering the stand inside, I used the craft knife to cut out the window. 


I lined the front of the stand up with the hole and adhered it. TIP:  Use liquid glue to allow more time to position your pieces exactly where you want them. If you find your hole does not quite line up, you can add some color all the way around.  Another option is to just cut the whole a little larger than the image before adhering.


I used the black marker to edge around the inside of the hole.  Next I placed Sarah. I added adhesive to her hat, face and shoulders, leaving her elbows free. I used liquid glue to place her behind her stand, so I could get her just right before pressing down.  For Sarah's produce,  I stamped the barrel and crate first, masked the tops and stamped the veggies. I colored them and cut them out.


Thanks for visiting!

Take care and STAY POSITIVE!

Trena  

Thursday, October 4, 2012

Art Impressions Challenge - Pink for Nat'l Breast Cancer Awareness Month


This week's Art Impressions Blog challenge is Pink for Nat'l Breast Cancer Awareness Month.  These two lovely ladies are out celebrating one year Cancer Free!!  Cancer has touched all of us in some way - someone we know, someone we love, someone we've heard of, has battled the disease.  It has been 30 years since my mother lost her fight to Breast Cancer. I am happy that there have been many advances in treatment to help women (and men) manage the disease and live full lives.  To find out more information , you can go to: http://www.cancer.gov/cancertopics/types/breast.

I used a combination of coloring and paper piercing to make this little celebration come alive.


I drew in the little ribbons on their dresses, added a little bling to their lips, jewelry and the candlelight with pens. For the inside, I added a strip of design paper and drew the ribbon.


List of Supplies Used
Stamps: Out to Lunch (Sku#Q3590)
PaperCryogenBasic Grey design paperStampin' Up! black
Ink/ColoringMemento Black ink padCopic Markers & .03 multiliner pen
Accessories: Sakura glitter & metallic pens

Please pop over to the Art Impressions challenge for this week to see a bunch of inspirational pink ideas!  You can enter for a chance to win a coupon!!

May God Bless you and keep you as he gives you Joys to make you smile and challenges to make you grow.

Thanks for visiting!

Take care and STAY POSITIVE!

Trena
  

Wednesday, October 3, 2012

Crafter's Companion Challenge - Fall Colors


This month's challenge at Crafter's Companion Challenge Blog is Fall Colors.

I inked up this cute bird image with VersaFine, stamped onto cold press watercolor paper sprinkled with emboss powder, and heat set.

Next, I trimmed down the paper and started coloring! My choice of medium today - Tombow Dual Brush Pens.  I worked in one small area at a time using  a combination of direct and in-direct methods to fill in color.  For the direct method, I colored directly onto the paper with the markers and then spread the color with a water brush, starting in the lightest area - and always starting with a clean brush.  In very small areas, I colored just a small amount and left part of the area without color - that would be the "lightest" color that I started in. For the in-direct method, I scribbled the marker onto a non-stick surface and picked up color with a water brush.  As with traditional water coloring, I wet the area first.  TIP: if you want more contrast, you can add a darker color after an area drys - this works with both methods.

On the inside I added a piece of matching design paper. 


List of Supplies Used
Stamps: Stamp-It-Australia EZMount™ Stamp - What a Hoot, Meadow Cottage Bears EZMount Stamp Set - Happy Birthday
Paper: watercolor 140 lb. cold press, Papertrey Ink design, Stampin' Up! really rust and very vanilla
Ink/ColoringVersaFine onyx black ink padTombow Dual Brush Pens,
Accessories:  Stampin' Up! black emboss powder, Watercolor Palette #WCPLT, waterbrush

Please pop over to the Crafter's Companion Challenge Blog to see a bunch of inspirational fall color ideas!  You can enter for chances to win great products from Crafter's Companion!!


Thanks for visiting!

Take care and STAY POSITIVE!

Trena
  

Tuesday, October 2, 2012

Spectrum Noir Technique


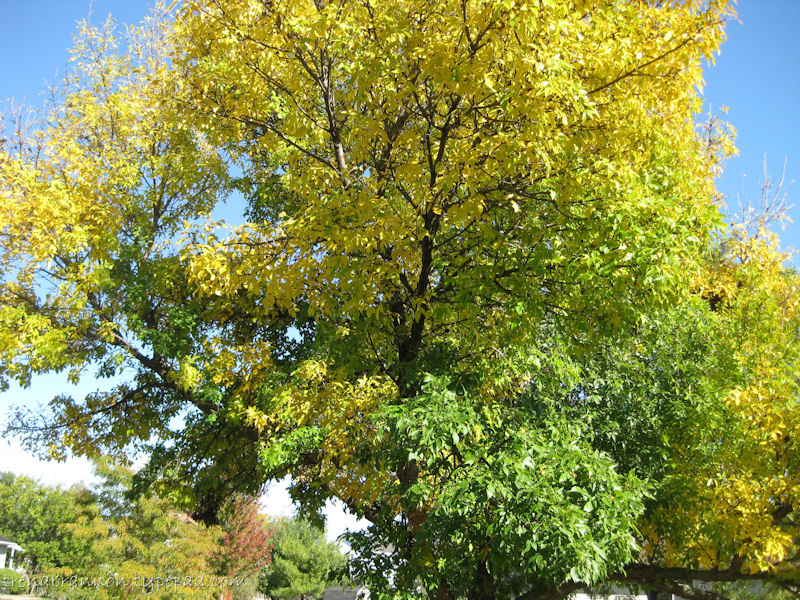
Today I'm sharing another Spectrum Noir technique!  Have you been thinking about coloring directly to rubber with Spectrum Noir markers but have not tried it yet?  I encourage you to go for it! That's exactly what I did on this card.  I was inspired by this tree in my yard.  I could see perfect leaves, not so perfect leaves, some are all one color, and others that are a blend of colors.


For my card, I picked the leaves from Sheena's A Little Bit Scenic - Silhouette Garden set. Oh!! How I love all the possibilities with her silhouette images!  I colored directly onto the rubber with my markers, using the chisel end. NOTE: with light colors, you will not be able to see the ink, but it's there!


Next, I spritzed with alcohol then stamped onto Ultra Smooth Premium White Cardstock for Alcohol Markers. NOTE: Do not spray directly onto the stamp, but allow the mist to fall on it. If you spray directly, the force of the spray washes the color completely off the stamp. Ask me how I know. :o) I was so happy with the blending that just 'happened!'


I repeated several times, stamping randomly. For the last couple of times, I just colored and stamped - no alcohol, I wanted to see the difference. One branch, I just used one color.  I liked how it turned out!  I cleaned my stamp right away, by spritzing a little alcohol and then water.


Next, I airbrushed a light blue sky with TB2. When I airbrush skies, I like to work in a horizontal motion and leave white space for clouds.


I used one of the new Embossalicious folders (I love that name! :o)) to give one of my layers texture.  On the inside I colored on the butterfly image and spritzed alcohol, allowing just the mist to fall on the stamp.


Here's a close up so you can see the cool texture it creates.


Description...

List of Supplies Used
Stamps: Sheena's A Little Bit Scenic - Silhouette Garden
PaperUltra Smooth Premium White Cardstock for Alcohol MarkersStampin' Up! black & summer sun
Ink/ColoringSpectrum Noir Markers,  VersaFine onyx black ink pad
Accessories: alcohol in a spray bottle, Copic Airbrush System, Embossalicious 6" X 6" Embossing Folder - Floral Frenzy


Thanks for visiting!

Take care and STAY POSITIVE!

Trena


Tea for Two at the Shoppe


These five little pumpkins are so cute! 


I knew I wanted to use them, but didn't know how.  I looked through my stamps to find just the right images to feature with them. The person who receives this invitation to tea could not say no to those little faces. :o) I stamped the door and window first. I masked the window and stamped the chair and table last. The pumpkins were stamped on a scrap piece of cardstock, colored and cut out. 


On the inside I put a little strip of the reverse side of the design paper and stamped the pumpkins.


Please come back tomorrow to see what great project that Crystal has to share!

Thanks for visiting!

Take care and STAY POSITIVE!

Trena