Today, my designs feature images from Sheena's A Little Bit Scenic - Flying Colors set. I am also featuring backgrounds I designed using my Gelli Plate.


I stamped the butterfly image three times onto Ultra High Gloss White Cardstock. I used Claudine Hellmuth's Acrylic Rock-A-Blocks Set for a nice crisp image.

I cut them out. and used a black water-based marker to edge them and also thicken their antennas.

To create the beautiful color blending, I used Spectrum Noir Ink Refills.
Butterfly #1 CT2, OR1, OR2 - traditional Monarch butterfly colors. I dropped color and let it spread and blend by itself. TIPs: (1) I used a scrap piece of gloss card stock under the images to catch any extra color. It also acts as a base that you can pick up gently to tilt your butterfly so the colors run together. (2) You only need a small amount of ink - a little goes a lonnnnng way. If you drop more ink than you want, dip the corner of a clean a paper towel into the area you want to pull color out.

Butterfly #2 DR3, GB4, TB6 -I spiced the color up a bit and also spritzed a little alcohol to help the blending.

Butterfly #3 LV1, PL1, PL3 - spritzed a little alcohol to help the blending.

After they all dried, I inked up the butterflies with a watermark ink pad, sprinkled ultra thick embossing enamel over them, and heat set. I then repeated for high gloss finish.


Next, I cut a section and used a combination of inks, including some rich LUXE color (available soon at Crafter's Companion), daubers, and found items (including a pizza box plastic thingy [which I did wash before using :o) ]) to add color and more design elements.


Background #2. It also started with a design from my Gelli Plate.

I used more luscious LUXE inks and also another image from the Sheena set - just inked up a small part to add pops of black.
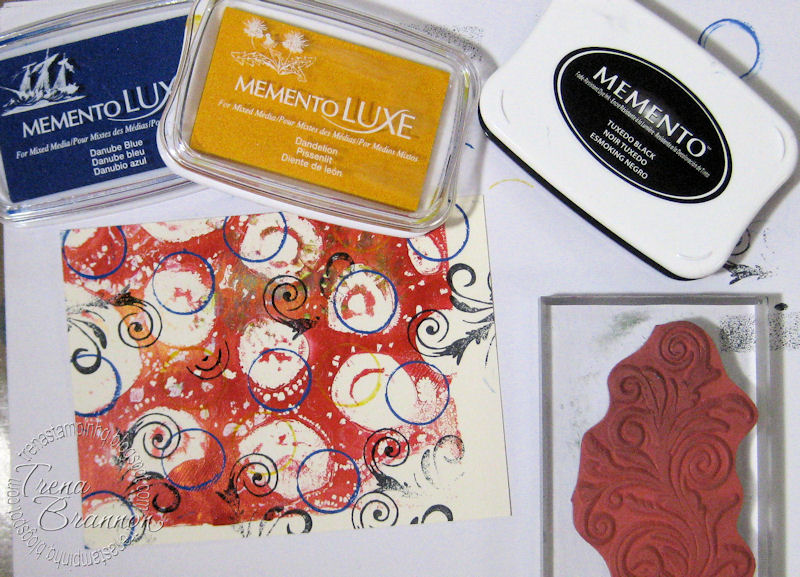

Background #3. I started with the scrap piece of high gloss cardstock I used to catch ink from the butterflies, spritzed it with alcohol and dropped in more color - DR3, LV1, PL1, TB6. I was a little heavy handed and dropped more color than I intended - this is how I discover tips to share. :o) When I was pulling up color with my paper towel, I started dabbing and found I liked the texture it created, so I dabbed a lot. I know, it's looks kinda funky now, but stay with me!

I cut the portion I wanted to use and ran it through my eBosser with the 5" X 7" Embossing Folder - Circle Background. Next, I slid a LUXE wedding dress ink pad across the top so the color would catch on raised design. It got a little color the pad, but that's ok. I wiped of the color with a paper towel. White ink is ready for the next project.


On the inside of each card, I added a strip of design paper to match the outside. To adhere the butterflies, I used Collall's Tacky-Glue in the center, allowing their wings to be free.

No waste! I'll save all the design pieces I did not use today for other projects!
Crafter's Companion has had several new releases. For more ideas, be sure to pop over to the Crafter's Companion Information Blog, as well as visit the Crafter's Companion DT members. You can see their latest designs by clicking on the names on the left side of my blog. We have two new members this season Tenia and Leah - and they are awesome!!
Thank you for visiting!!
Take care and STAY POSITIVE!
Beautiful cards!!!Beautiful butterflies!!!Thank you for the tutorial!!!Have a good evening!!!
ReplyDeleteYour butterflies are so pretty. I love the beautiful inks you used. Have a great day girl!
ReplyDelete