In a previous post, I shared a poppy scene that looked like stained glass. In this post, I'm using a similar technique, starting with white cardstock and coloring with my Spectrum Noir Markers.
I started by stamping the Stamp-It Holiday Collection EZMount Stamp - Poinsettia image onto Ultra Smooth Premium White Cardstock for Alcohol Markers, sprinkled clear embossing powder and heat set. I masked the first image and stamped another, sprinkled emboss powder and heat set. I recommend clear embossing powder with alcohol inks.
Next, I drew the lines and curves with a black permanent pen, went over them with a watermark pen, sprinkled with emboss powder and heat set.
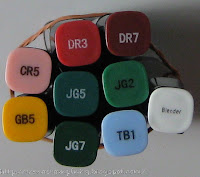
Time for coloring! I used the colors below to fill in. In some areas, I pressed too hard with the watermark pen and the embossed line is a little wider than the black line. I actually like how it turned out. You can see the texture of the embossing through the color. Next time, I may make the black line wider, or may do it just like this again. I love choices!
I really dig the vibrant colors of the Spectrum Noir ink. To see many more cards and projects using Spectrum Noir Markers, as well as tips and tutorials, please visit the Spectrum Noir Blog.
Thanks for visiting!
Take care and STAY POSITIVE!
List of Supplies Used:


This is so beautiful Trena! Love this technique, I will have to try it for sure. :)
ReplyDeleteYour card is very beautiful.This is such a great looking technique and I am definitely going to try this.
ReplyDelete