Tuesday, December 25, 2012

Jesus Is The Gift

Merry Christmas!!
Today many people around the world are celebrating the true gift of the season.


Inspiration can come from many places. Sometimes it just pops out at you. It can be a life changing inspiration, or a color inspiration - for me, both make me smile really big. The design of this card was inspired by a wall decoration I saw in an advertisement. I cut white cardstock to the final size. For the first layer of color, I used a yellow ink pad and applied it directly to the whole piece of cardstock, leaving some white space. 


I stamped a few images, Branches (Sku#F2055)Jumbo Grass Stalks (Sku#I3007) and Jumbo Lilies (Sku#H2995)with a watermark ink pad, sprinkled with clear emboss powder and heat set. For the next layer of color, I taped of a section. To help keep my lines straight, I laid it on a ruled mat. I built color by the same method of applying ink directly to the taped off section. NOTE: I slid a piece of scrap paper under the cardstock to protect the mat. I rubbed the ink off the embossed images with a paper towel.  I allowed the ink to dry before moving to the next section.


I continued to build color with this process, leaving an area of yellow for the main image, Jesus is the Gift (Sku#F4175).  I also used a blending tool in some areas to get right up to the edge of the tape.


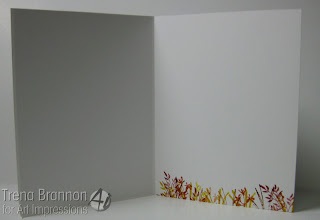
I used black soot for the main image, sprinkled with emboss powder and heat set. On the inside I stamped the the flower/foliage images across the bottom in various colors.


Wishing you Joy and Peace this beautiful season!

Take care and STAY POSITIVE!

Saturday, December 22, 2012

New Stampscapes Images

NewSS

Kevin just released several new scenic images! Click on the photo for more information and also see ideas for how to mount and store bare rubber images.

Thanks for visiting!

Take care and STAY POSITIVE!

Friday, December 21, 2012

Happy Birthday One Year Old!

S.w.a.l.k. designs has an image for every occasion and in this post I'm sharing a card I made for a baby's first birthday featuring the adorable image called Sweet Little Girl.


I colored the image using my Spectrum Noir Markers and paper pieced the pillow. When I paper piece, I use a black water based marker to edge the pieces. The black edge helps to provide a nice finish. I used IG1 to give the pillow a little shading.  To color the kitten, I colored her with IG4 and then used IG1 and the Blender to dot in some texture.


I used punches to cut out different size circles from my scraps to match the design paper. On the inside I added a sentiment that comes in the set and layered it on a piece of the design paper.


A bright card for a bright little 1 year old!

Resource: If you need some tips on coloring skin, I highly recommend visiting the Spectrum Noir Blog video tutorial on coloring skin. The tutorial covers both light and dark skin.

Thanks for visiting!

Take care and STAY POSITIVE!

Thursday, December 20, 2012

Art Impressions Challenge - Thinkin' Thumbprints


This week's Art Impressions Blog challenge is Thinkin' Thumbprints. I'm featuring Art Impressions new Girlfriend image Up and Away (Sku#Y4231). Art Impressions pledges to donate 100% of all proceeds of this 2013 Limited Edition stamp to the Obediah Fund, which will support Open Arms International's Kambi Teso outreach.   Click here to find out more. 

I started with the background.  I used my thumb to press into two different colors of green and "stamped" along the bottom of Paper Studio design paper.


I then took a waterbrush and lightly blended color. NOTE: I used very little water, being mindful that I was not on watercolor paper.


I then stamped the image onto the background for placement and for fine lines.


Next, I stamped the image onto watercolor paper, sprinkled with emboss powder, and heat set. I used Tombow Dual Brush Pens to add color  I worked in one small area at a time using  a combination of direct and in-direct methods to fill in color. For the direct method, I colored directly onto the paper with the markers and then spread the color with a water brush, starting in the lightest area - and always starting with a clean brush.  In very small areas, I colored a small amount and left part of the area without color - that would be the "lightest" color that I started  in with the water brush. For the in-direct method, I scribbled the marker onto a pallet and picked up color with a waterbrush. As with traditional water coloring, I wet the area first. I cut out the main pieces that I colored.  I used a multi-liner pen to give them each some lip color.


Please pop over to the Art Impressions challenge for this week to see a bunch of inspirational Thinkin' Thumbprints ideas!  You can enter for a chance to win a coupon!!

Thank you for visiting!


Take care and STAY POSITIVE!

Tuesday, December 18, 2012

I'm Not Bossy

Do you have friends (or relatives) that know exactly what you should be doing? :o)


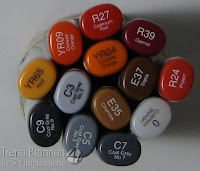
Here's the prefect card to give them. It features Not Bossy (Sku#G2624)  and Buzzards (Sku#Q1183) .   I just love the expression on the non-bossy buzzards face. I colored the image with Copics and cut it out.  Whenever I cut out an image, I like to edge it with a black marker to give it a finished look - the definition helps the image to pop.  I stamped the image onto the design paper for positioning and to pick up any fine lines I cut off when I cut out the image.


I used liquid glue to adhere my image - that way, I had time to shimmy it and get it just right.   Please come back to tomorrow to see what cool project Crystal has to share!

Thanks for visiting!

Take care and STAY POSITIVE!