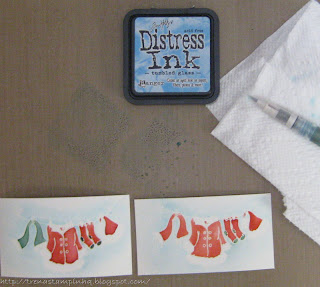
The featured image is Stamp-It Holiday Collection EZMount Stamp - Santa's Gear. I inked up the image with a VersaMark Watermark Ink Pad, stamped onto water color paper, sprinkled with clear embossing powder and heat set. Next, I created my palette by tapping each ink pad on my non-stick craft mat. I used a water brush to paint clear water first within an embossed area, then picked up color and dabbed it in, staring where I wanted the darkest color. You'll want your brush to be damp, not dripping wet. With a little practice, you'll get the hang of it!
One of the nice things about this technique is that it is very forgiving - I love forgiving techniques, given the amount of booboos that can happen. :o) After an areas dries, you may get hard edges in your coloring. To remove, make sure you have a clean brush and lightly color small circles over the hard edge to blend. You can also add more color. If you do, be sure to wet the entire the inside embossed area so you will not get those hard lines. If you find you go out side an area, go over the areas with clear water and dab with a clean paper towel. Also, be sure to allow an area dry completely before you paint an area right next to it. The beauty of this technique is the blending that occurs - which is also the ugly of this technique, when two colors blend together that you do not want.
Next, I painted the sky. This is when you see your images start to pop. I laid down clear water first and then dropped in blue, starting closest to the image and working out.
As finishing touches, I used the Embossing Folder - Plaid Pattern Background on design paper for the background layer, and Stardust Stickles for dimension.
Thanks for visiting!
Take care and STAY POSITIVE!


Great tutorial Trena! Love the finished card and the technique. :)
ReplyDelete