
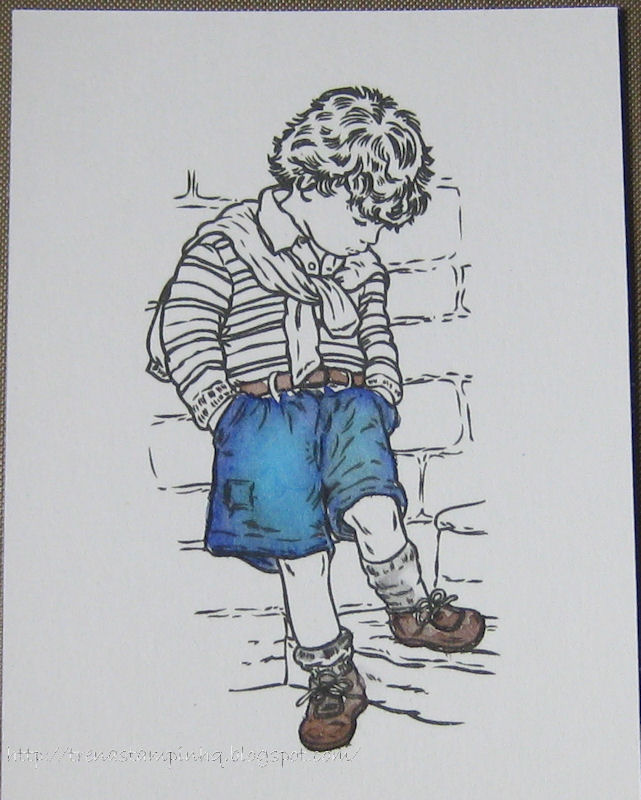
The new Poppet images are perfect for water coloring!! Hi, Trena here to share a card I made using water based markers for water coloring this adorable little boy. I was inspired by the lovely coloring Dawn did last week ! I used a combination of in indirect and direct methods for adding color. One of the nice things about these images is that the artist drew in areas to guide you for adding shading.
I stamped the image onto watercolor paper. With watercolor, I recommend StazOn ink. For the indirect method, I scribbled markers onto a plastic pallet - I used two shades in the larger areas. I then used a water brush to pick up color and spread onto the image. Starting with his shorts here.
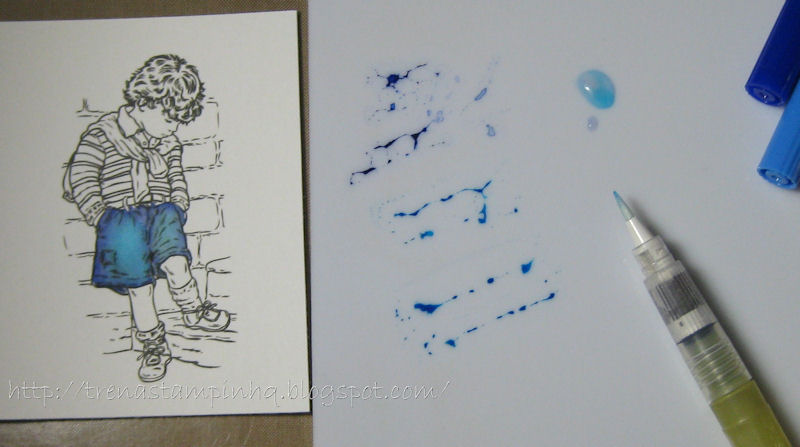
I skipped his legs and moved to his socks, then his belt, and then his shoes. When water coloring, you want to allow colors to dry before coloring the next section - otherwise, your colors will all run into each other. Although, depending on what results are you are looking for, you may want that in some areas. :o) As I colored, I left some areas very light, or with no color for highlights.
I continued to fill in color. For very small areas, I used the direct method - coloring directly onto the paper and then spreading color with the water brush.

For the background I used indirect and added a hint of color - I wanted my image to pop out.

TIPS: To give a little extra shadow, use grey to darken overall tone. If you have any hard lines, re-wet the area with clear water, then add a little of your lightest color for that area. Most important, have fun with it!!
Stamps: Poppets
Paper: Strathmore 140lb cold press watercolor paper, Stampin' Up! basic black card stock, Georgia Pacific white, Basic Grey
Inks: black ink, Tombow Dual Brush Markers
Accessories: water brush, Sizzix emboss folder
Take care and STAY POSITIVE!
How sweet of you to say I inspired you!
ReplyDeleteThis turned out cute as can be
Beautifully done Trena! Love the cute image!
ReplyDelete