Thursday, February 28, 2013

Art Impressions Challenge- "Shake it!" - Use a Wobble

This week's Art Impressions Blog challenge is  "Shake it!" - Use a Wobble.


I picked Pet Shoppe (Sku#3526) and chose the fire hydrant to wobble.  I stamped  Shoppe Window (Sku#3515) first, masked the edges and stamped the animals inside the window.  I colored with markers.


I found the perfect background paper in my stash, but it was too bright. I toned it down by blending ink onto it, and also added ink around the image.


Next, I adhered the layers and the wobble. I put the fire hydrant on matching paper and layers.


Please pop over to the Art Impressions challenge for this week to see a bunch of inspirational  "Shake it!" - Use a Wobble ideas!  You can enter for a chance to win a coupon!!

Thanks for visiting!

Take care and STAY POSITIVE!

Tuesday, February 26, 2013

What a Day!


Do you ever have one of those days where you just feel like everything is going wrong and your life is like a country song?


This Clothesline Cow (Sku#U1485) has had a day like that. I colored her with markers.  I used a white jel pen for the polka dots on the shorts.


For the background, I Googled cow patterns and found some free clip art, which I printed out onto card stock.


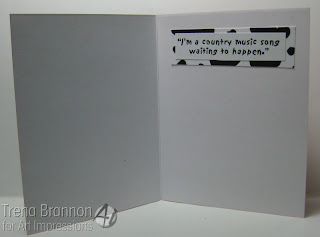
On the inside, I added the sentiment Country Song (Sku#G2626)  layered on top of the cow pattern.


Thanks for visiting!

Take care and STAY POSITIVE!

Friday, February 22, 2013

Take Time To Relax


Inspiration for a design can come from many places - something you see in a window, a magazine, or even something someone is wearing.  It can be a scene outside of your window. My design today was inspired by words. Words from the new Crafter's Companion Crisalis (Christine Haworth) Release. 

One of the ways for me to relax is to be outdoors. When I can feel a warm breeze, hear the sound of leaves gently blowing, and birds singing, I am put in a natural state of relaxation. I can breath deeply...I can meditate...I can be at peace. To create this peaceful design, I started by embossing a set of lovely trees onto glossy card stock.


For my color pallet, I chose  Spectrum Noir ink refills GB5, GB6, GB9 and CG1. I spritzed alcohol onto the card stock, dropped color in, and blew the color around with a straw. When it started to get dry, I spritzed a little more alcohol and added more color. I repeated until I was happy with results.


 After it dried, I adhered the layers and added the sentiment.


On the inside, I added a small strip of the inked design.


Thanks for visiting!

Take care and STAY POSITIVE!

Thursday, February 21, 2013

Art Imperssions Challenge-Behind the Mask" - Masking Techniques


This week's Art Impressions Blog challenge is Behind the Mask" - Masking Techniques.  When masking in stamping, you stamp the image(s) in the foreground first. To create this scene I stamped the Wooden Table (Sku#F1724)  first.   I used a stamp positioner to add the Lemonade (Sku#G1738) on top of the table. 


Next, it was time to mask the foreground images so that when I stamped the background, they would be protected. I use two types of masks - masking fluid and masking tape.   For large or wide areas I like the tape. For very small areas, I like to use masking fluid.  In this case there's a small open space between the glass and lemonade picture, so I used masking fluid. I painted the images with the masking fluid.
  

After the fluid dried (about 30 minutes), I used the stamp positioner to stamp the Harvest TF (Sku#4205)  right over the table. I extended the path with a multiliner. I dabbed the ink off the masking fluid. I learned that from my stampin' sister Barb G. I made sure my fingers were clean and then removed the masking fluid. I used an adhesive remover to get it started then gently rubbed it all away with my fingers.  You can see the barn and trees behind the picture of lemonade.


For the sky, I used masking tape to mask the images and airbrushed B23.


I used Copic Markers to color. 


After I colored, I masked the again and went back in with  the airbrush and deepened the blue in the sky.  I colored a glaze pen over the picture of lemonade and glasses. Used a white paint pen to brighten square on table cloth.

NOTES: I have a dedicated paint brush for masking fluid. To clean it, I use glycerin soap and leave soap on the brush as a coating. I dip into the masking fluid with the coating on. I paint just inside of the image outside line. If you paint right up to the line, you may get a hallo (white space).  When using masking tape, I cut on the inside of the outside image line.   I've used the masks before and after I've colored. You may want to test the first time using your supplies.

I hope this post helped you with your masking! 

Please pop over to the Art Impressions challenge for this week to see a bunch of inspirational Behind the Mask" - Masking Techniques ideas!  You can enter for a chance to win a coupon!!

Thanks for visiting!

Take care and STAY POSITIVE!